In this series of posts, I will demonstrate the steps to deploy Local Administrator Password Solution(LAPS) by SCCM. This is the first post that shows the prerequisites for the deployment. You can also check the other posts by the below links:
Why Use SCCM?
The “Local Administrator Password Solution” (LAPS) provides management of local account passwords of domain joined computers. Passwords are stored in Active Directory (AD) and protected by ACL, so only eligible users can read it or request its reset. Our goal is to deploy LAPS without affecting end users, and users will not be able to remove the program. You can also deploy the solution by Group Policy, login script, manual install, etc. However, using SCCM to deploy LAPS has some benefits:
- You can monitor the progress of deployment
- LAPS can be deployed by your chosen time
Resources
Test environment
- Microsoft Windows Server 2012 R2 Standard
- System Center 2012 R2 Configuration Manager SP1 (Site version: 5.00.8239.1000)
Get DLL files
First, You will need AdmPwd.dll files on both x64 and x86 version (if you have x86 machines)
- Download LAPS.x64.msi and LAPS.x86.msi
- Install all LAPS feature on your workstation
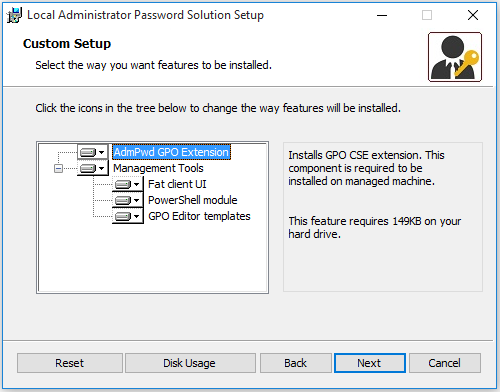
- Find the AdmPwd.dll file in the %ProgramFiles%\LAPS\CSE folder, you will need both x64 and x86 version
- Rename the file to AdmPwd64.dll and AdmPwd32.dll
- Put the files in the shared resource folder so SCCM can find them
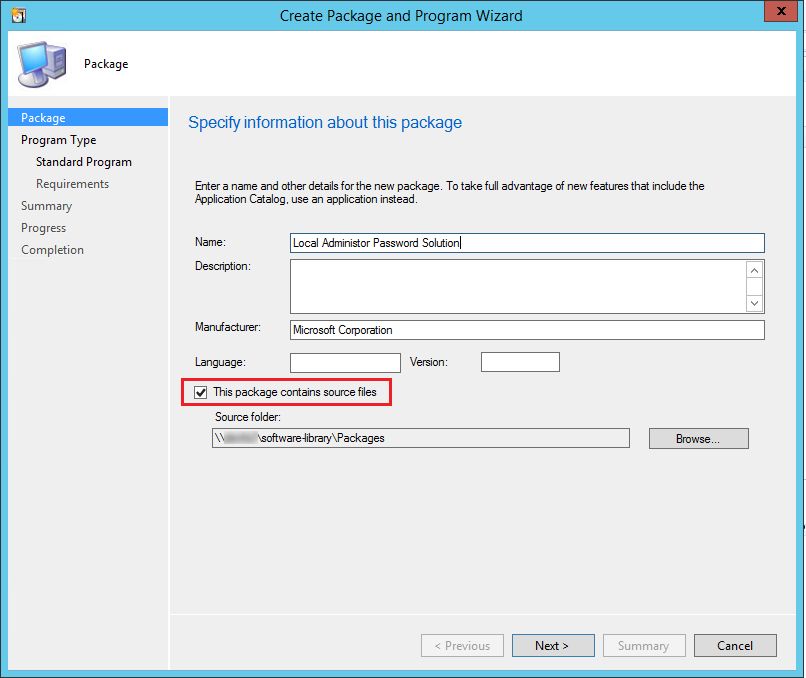
Create a Package in SCCM
We will use package to contain the DLL files since the files will need to be copied to client machines.
- Select “This package contains source files” and point to where your AdmPwd.dll located
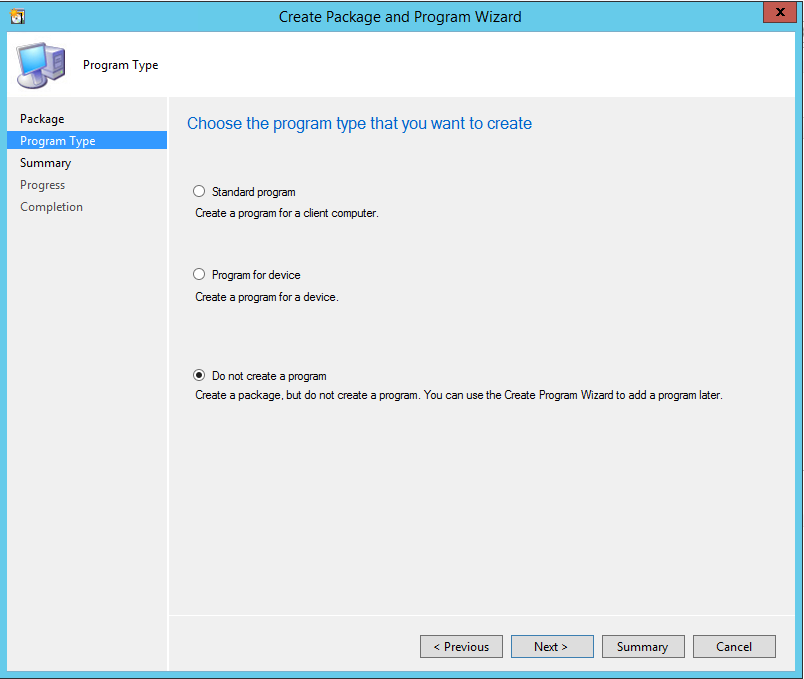
- Select Do not create a program, we will create programs later, click Next to finish
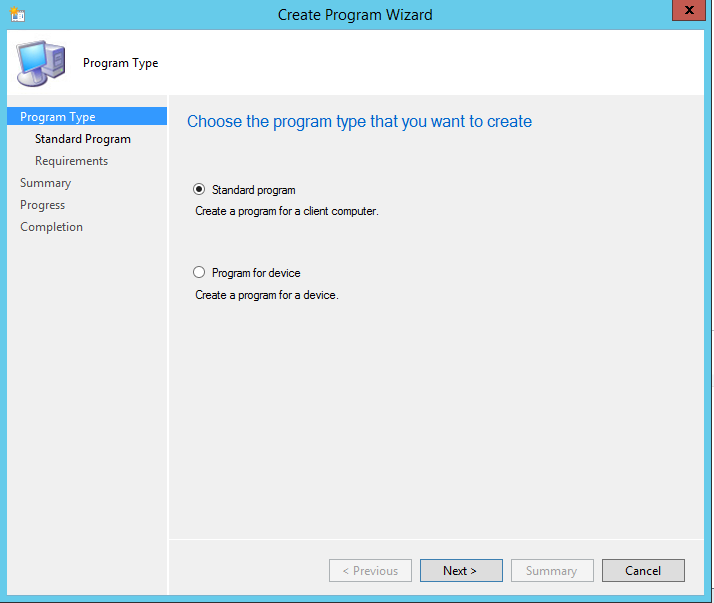
Create Programs in the Package
The programs will have two actions, copy file to the local machine and register the DLL.
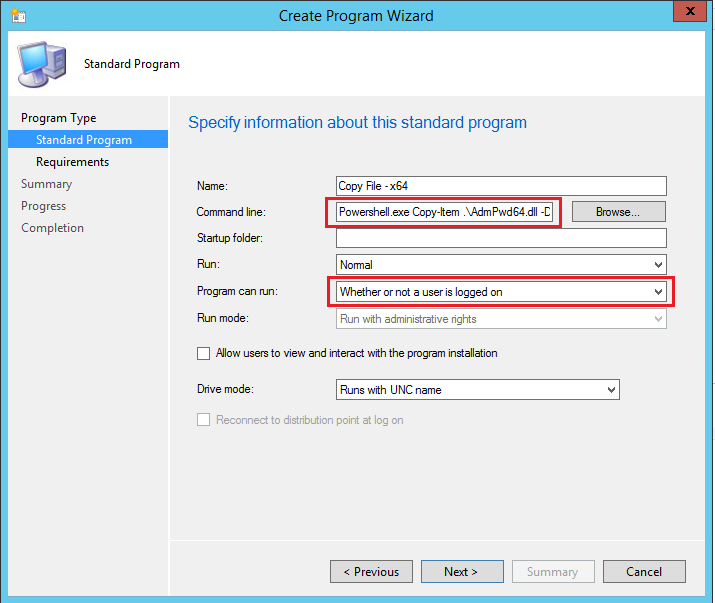
- In Create Program Wizard, select Standard program
- Copy the below command into Command line. This will copy the DLL file to $env:windir (C:\Windows\) using PowerShell, you can replace $env:windir to your preference. In Program can run option, select Whether or not a user is logged on. Click Next to finish. Repeat the same procedure for x86 version.Note: I tried to put the DLL file in $env:windir\System32\ but it failed to register.
Powershell.exe Copy-Item .\AdmPwd64.dll -Destination $env:windir\AdmPwd.dll -Force
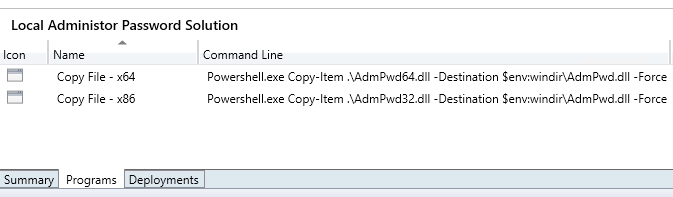
- You should see two programs in the package
Now, you have the Package ready for the Task Sequence deployment. Next, we will go through the deployment process.